Quick Start Guide

Get your organization up and running with OrgsLedger in under 5 minutes.

OrgsLedger is designed to get you started quickly. This guide walks you through creating your organization, inviting your team, and hosting your first AI-powered meeting.

💡
Free tier available

Organizations with up to 5 members can use OrgsLedger completely free, including basic meeting features.

What You'll Learn

  • How to create and configure your organization
  • Inviting members and assigning roles
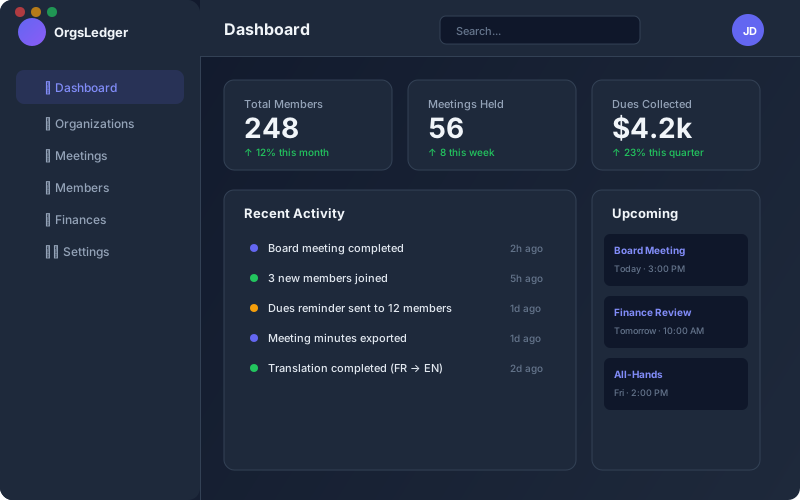
  • Navigating the dashboard
  • Scheduling and running your first meeting
1

Go to OrgsLedger

Navigate to orgsledger.com/app/signup to create your account.

2

Enter Your Details

Fill in your name, email address, and create a secure password.

3

Verify Your Email

Check your inbox for a verification link and click it to activate your account.

⚠️
Important

Use an email address you have access to. You'll need it for password recovery and important notifications.

After signing up, you'll be prompted to create your first organization. Each organization is a separate workspace with its own members, meetings, and data.

OrgsLedger Dashboard
1

Name Your Organization

Choose a name that your members will recognize. This can be changed later in settings.

2

Choose Your Plan

Select a plan based on your member count. Start with Free if you have 5 or fewer members.

3

Configure Settings

Set your timezone, default language, and notification preferences.

Organization Settings

SettingDescription
NameYour organization's display name
LogoUpload a custom logo (recommended: 200x200px PNG)
TimezoneDefault timezone for meeting scheduling
LanguagePrimary language for the organization

Now that your organization is set up, it's time to bring in your team.

1

Navigate to Members

Click on "Members" in the sidebar, then click "Invite Members".

2

Choose Invite Method

You can invite members by:

  • Email: Enter email addresses directly
  • Invite Link: Share a unique link anyone can use to join
3

Assign Roles

Choose the appropriate role for each member.

Pro Tip

For large groups, use the invite link method. You can set it to auto-approve members or require admin approval.

Available Roles

  • Admin: Full access to all settings and features
  • Treasurer: Financial management access
  • Secretary: Meeting and document management
  • Member: Standard member access

With your team in place, schedule your first AI-powered meeting.

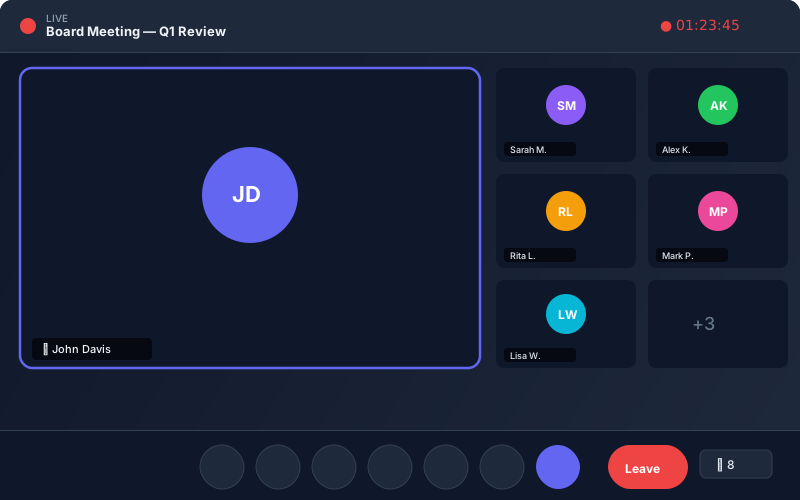
OrgsLedger Meeting Room
1

Click "New Meeting"

From the dashboard, click the "New Meeting" button.

2

Fill in Details

Add a title, description, date/time, and select attendees.

3

Enable AI Features

Toggle on transcription, translation, and AI minutes generation as needed.

4

Send Invitations

Click "Create Meeting" to save and send calendar invitations to attendees.

During the Meeting

  • Use video/audio controls at the bottom of the screen
  • View live transcription in the side panel
  • Access chat for text-based communication
  • Click Record to save the meeting

OrgsLedger includes a built-in in-app browser that opens links, documents, and resources directly inside the app — keeping you in the workflow without switching to an external browser.

🔔
Stay Notified

Because the in-app browser keeps members inside OrgsLedger, push notifications are delivered instantly — meeting reminders, messages, financial updates, and announcements arrive in real time.

Key Benefits

  • Instant push notifications — alerts for meetings, messages, dues reminders without leaving the app
  • Seamless browsing — open shared links and documents inline
  • Meeting alerts — never miss a scheduled meeting with real-time join reminders
  • Financial updates — receive payment confirmations and dues alerts immediately